Saturday 7 December 2013

And there's more......

You know how it is. Nothing for ages and then two posts in two days!
So not only have I fitted the wheels, tyres, and crank I have put the stem and handle bars on!
They are lacking bar tape. And brakes, but you get the idea.
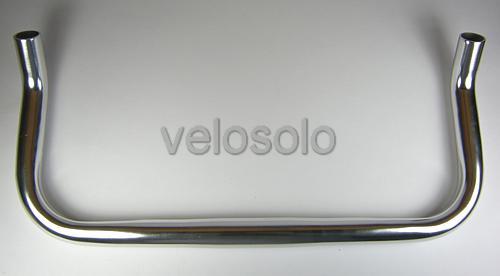
 It was a bit of a faff to fit the handle bars to the stem. I had to open the stem up a bit to get the bars through.Just a quick tweak with a flat blade screwdriver to open the clamp up a bit to get the corner through and its done!
The tyres are Schwalbe delta cruiser. They have a puncture resistant design which I suspect I will test to the limit! 

Next will be the brakes. I will need to get the right ones as I have a large drop. Woof! This is the gap between the mounting hole in the bridge and the centre of the wheel rim. The rear brake needs to have a drop of around 73 mm which is quite a lot. I suspect this is because I have a 26" wheel in a frame which would have taken a 27". I know I can get the correct brakes from the joy that is Ebay!


So next pay day....! 


Friday 6 December 2013

Catching up......

It's been a while since the last post so, in answer to the literally zero requests for update here we go.
Since the last payday I have fitted the bottom bracket, front and rear tubes and tyres.


The bottom bracket was a challenge to say the least! The unit itself is a good bit of kit. Its designed to fit into a bottom bracket shell with damages threads so its perfect for older bikes with older raleigh style cup and cone bottom brackets.


This is it fitted hand tight. As you can see the shaft is longer on one side which if it was fitted to a 68 mm is not a problem. As the shell on this frame is 71 mm it means that there is a slight difference in length between the left and right hand side of the shaft. This is because the bottom bracket tightens up on one side only so the fixed side stays the same length while the other side slowly emerges as it is tightens. Basically I had to install it the wrong way around to ensure the crank and crank arm didn't catch on the outside of it.  


Wednesday 30 October 2013

Pay day at last!!!!!

At last pay day is here!
 I have ordered the Velo Orange grand cru threadless bottom bracket.
Sounds like a luxury item no cyclist can do without.
I have also sneaked a couple of Schwalbe Delta cruiser 26 x 1 3/8" tyres with amber side walls no less!  AND two inner tubes to match. Such extravagance....
Still a long way to go before its complete though. So, to keep my spirits up and plant a few seeds in a few minds, I have been looking at a some bespoke frame builders. 

Since the demise of the British cycle industry coupled with the fact you can walk into a shop and pick up a nondescript bike for a couple of hundred pounds and ride it home, cycling, in my humble opinion, got a bit boring! Over the past few years the spirit of the British back room engineers that developed things like the jet engine and the Blue Streak missile has been flourishing in sheds and workshops around the country.
One of these is feathercycles based in Yorkshire. 
The best bit of the website for me is the short video which shows Ricky Feather working in what looks like a shed in his back garden and turning out some fantastic looking cycles.
Another is Donhou bicycles. These guys made a bike from scratch to have a go at the cycle land speed record! The crank has 104 teeth! Have a look on the website and watch the Experiments in Speed video.


Land Speed Bike
There is a massive movement now for hand built bespoke frames. There are also a few courses available to learn how to build frames. There's a show, Bespoked, for just such beauties.  

So I've found a supplier of frame building parts based in Kent. All I need is a workshop and a gas torch and I'm off! Maybe one day.....Eh Dar (you know who you are)!  


Friday 18 October 2013

Mock up...

Had a bit of a play with the crank today. I'm impatiently waiting for pay day to arrive so I can buy the bottom bracket, wishing my life away while staring at components on eBay! What has my life become?
I used the threaded bar to fix the crank onto the bike using washers and nuts. I have to have a fix every now an then to remind me of what I hope it will look like when it's finished.
Really happy with the crank. Its a sturmey Archer with 42 teeth. Just want to get it fitted now. Then I can go back to staring at more stuff to buy!

Thursday 10 October 2013

For forks sake!!

Its in......I managed to press the headset in today with a nifty gadget I made up. Not the hammer and lump of wood I was looking forward to using but a length of threaded bar I had sitting around the shed, as you do. This together with a couple of nuts and a few square washers.
This is the set up I used. Its a bit basic but it worked really well. the threaded bar runs through the tube and the bearing cups are fitted, a liberal amount of copperslip grease was applied. This will hopefully stop any rust forming in the long term. 
ACME head set press
Then two large washers were put on top of the cups and then a nut at each end. I then used a spanner to tighten the nuts up. The washers kept the baring cups straight so they went in a treat.


This is how it looks now.........


Very happy with it. After this I fitted the Front fork. This was a bit more of a challenge. There is another bearing cup the needs to sit on the bottom of the steerer tube. This is an interference fit and needs to pushed in. In order to do this I ended up having to heat up the bearing cup to make it expand a bit then use the ACME bearing press (pat pending!) to press it on. Once the bearings had been cleaned and greased up with a bit of lithium grease I managed to fit the fork too. Which was nice.

Assembled front end
After this, I used the threaded bar to mock up the bottom bracket by fixing the crank to the bike with a couple of washers and nuts. I then had a job to adjust the crank to match up the rear chain line by adding or removing extra washers. I managed to get it as close as possible and worked out I will need a bottom bracket with a 110 mm spindle! So come pay day that's what I'll get.


Wednesday 9 October 2013

Cycle-logical change.....

....See what I did there! Anyway. I find myself looking at old bicycles that are chained up at various points around town and thinking what they may look like after a quick spruce up. Its getting a bit of an obsession! I'm thinking of sneaking around under cover of darkness and setting them free!
I've been trawling the internet for inspiration for the finished look of the bike which has resulted in me thinking about the next build already!

foffa bikes have the facility to build your bike on-line and choose the specification of the equipment and colours of even the tyres.

Pitango bikes is another bike building site where you can even choose what colour chain you want!

What I have been doing is looking at the equipment specifications on these bikes, bearing in mind they cost upwards of £350, and going onto e-bay and seeing if I can source them cheaper. For the most part its possible to get things like old style brake calipers for around £20, brake levers for around £17, its when you start looking into the individual components that the real cost starts to show itself. There are different prices for the same stuff! 
I like the bull horn style handlebars: These are £59.95
  
and these are £21.95
Its like everything else if you want to pay for a named brand then you can spend a fortune. If you want a similar look for cheaper its possible. Which is just as well for me!

Friday 4 October 2013

Things to do....

I did publish the post before but a finger malfunction led me to delete it! I'm sure this version is much better....

I hate writing lists but I suspect that I will be writing a few with this build.
Firstly I need to take 2 mm from the bottom of each rear drop out. This is due to the spindles on the rear wheels being 10 mm in diameter and the drop out slots being a bit different!

Rear drop out
The size difference is due to the fact that the frame is an old Raleigh type frame. Raleigh were well known for not conforming to the usual standards and decided that they would stick to the old whitworth standard to make their bikes. Now days we work on the metric standard which is slightly different. Lucky me!
This link explains the history of Raleigh.
When this is done I can mount the rear wheel and work out the chainline.

The chainline needs to be straight otherwise there is a risk the rear cog and the main crank will wear in such a way that the chain will come off.
I have put the rear wheel on roughly where I think it will go and measured the rear chainline at 44 mm. Now I need to transfer that to the crank by measuring 44 mm from the center of the seat tube to the center of the crank. The main stumbling block for this is I don't yet have a crank.....or a bottom bracket...YET! The length of the axle in the bottom bracket together with the design of the crank will influence the front chainline as the diagram on the left illustrates. 
Sheldon has more info on the early Raleigh issues.
Just wish I knew about it before I'd started!

As for the bottom bracket, when I have mounted the rear wheel correctly I can accuratly measure the rear chainline, I have my eye on a Sturmy Archer 44 teeth crank on E-bay which the manufacturer states has a 45 mm chainline on a 110 mm spindle. All 'English thread' bottom brackets these days are for a 68 mm shell. Of course it would be too much to ask for this frame to have any thin standard on it!! My shell is 71 mm ish. This is due to the fact it used to use an old style cup and cone arrangement which was nice.


Bottom bracket shell


Cup and Cone


So the choice is I can either spend ages looking for the right size cups, the correct length spindle together with the right bearings or...........I just say bugger that and buy a threadless bottom bracket (BB)! Which is what I'm going to do. A threadless BB does what the name suggests, It doesn't use the threads in the BB shell. Instead it tightens up against the outside of the shell and uses a tapered shim inside to stop it all from working loose.  A lot less mucking about. 
Due to the fact that the specification of the crank suggests a 45 mm chainline for a standard 68 mm BB with a 110 mm spindle (Oh do try and keep up!) My BB shell is 3 mm wider so I need to take that into account. So if I had a 110 mm spindle my chainline would actually be 48 mm which is wider than that on the rear. I could have problems with wear on the crank and the chain coming off when I'm trying to pose whilst cruising around! Not good. So looking at the options for the threadless BB, they do it in a 107 mm version. Which is only bloody perfect! 
These measurements will only ring true when I have fitted the rear wheel. 
So to work then. Where did I put that angle grinder! 


Monday 30 September 2013

And so it begins.........

Well, I have received my wheels, fork and headset in the post and I have tried them on for size.
 Its a mixed bag! The front fork and front wheel look good. I will have to press the headset into the header tube, which could prove interesting. There seems to be a specialist tool For everything as far as bikes go.
The rear wheel.....now.....deep breath.....the axles are too big! That is due to the fact the frame is from around the time when standards throughout the bike industry were a bit sketchy to say the least. As its a Triumph (Rayleigh) frame it seems that trying to pin down the exact specification is nigh on impossible. As a result I am going to have to do some fettling! Firstly I need to make the drop-outs on the rear of the frame wider to accommodate the new axles. Nice!
I also need to cut down the steerer tube on the fork. My specialist tool of choice for that is the humble hacksaw. This will have to be done after the bearing cups (the fitting that takes the ball bearings in the headset) have been pressed into the frame. This is normally done by using a specialist tool called, surprisingly a headset press. I have done it in the past with a hammer and a piece of wood. I may have to revive that method. So it seems that as per usual with these sort of things there is more work to be done before any progress is to be made.
Ever onwards....


Friday 27 September 2013

Plunge Taken!!!


Well the deed is done. I have bought the wheels, fork and headset and now I am itching to get on with it!

I had a real internal struggle with choosing the wheel size. I fell in to the trap of following trends and was really trying to figure a way of fitting some 27" wheels to the bike when I had a brain fart. Fit 26" instead. Easy really.

So I purged my watching list on e-bay of the many 27" wheels and the one and the only suitable 27" fork and started searching again. E-bay is a really good resource for reasonably price bike bits. I'm not that precious about the manufacturer of the parts I'm fitting to this bike as its the first one I've done especially as the price difference between a part with an unknown brand on it and a well known brand can be hundreds of pounds.
I managed to find a pair of 26" wheels with a over locknut distance of 110mm, a front fork with a 1"steerer and a headset for less than £90 for the lot. Bargain!

Right Jargon busting time. 

Over locknut distance you should know, if not look at the last post.
1" steerer. This is the part of the front fork ( the bit the front wheel is attached to) which runs through the front tube (head tube). It is fixed to the bike by a headset. This is basically where the bearings are to enable you to steer the bike. Its the bit you loosened when you were a kid and then the front of your bike fell off....Just me then.

There are a couple of good E-bay shops that I have saved: Bankrupt bike parts and Bankrupt surplus bike bits. Sounds a bit dodgy but they normally have a good stock of old new bits if that makes sense.
Bankrupt bike parts is where i have ordered my bits from and they also stock the correct size tyres and inner tubes so I suspect they will be getting more of my custom soon.
When I started thinking about building a bike I looked at a few websites and manufacturers to get some inspiration. I discovered a magazine called Urban Cyclist. This is full of beautiful looking bikes which I never thought I would have an interest in. 
I'm beginning to wonder if this is my mid-life crisis hitting me and I just can't afford a Harley Davidson. 
One bike I saw that was absolutely stunning was called The Board Racer Special from Cosgrove Ball. http://cosgroveball.com/blog/
It really confirmed to me that even though that bike will cost around £4500 to buy, I would really love it if I had something like that that I could be proud to say 'I built that'. Even if it only costs £200 (hopefully!).
So Monday is the day the first parts get delivered. We shall see if they work. Otherwise I'll be selling the lot on Gumtree! 

Thursday 26 September 2013

Lessons learnt


So the first lesson has been learnt. I was expecting to put some up to date sized wheels which are known as 700c, 27" in old money. I have a cyclo-cross bike with these wheels so I offered them up to the frame and...they don't fit! Not only is the diameter too big but the hub, the bit with the axle and gears on, is too wide. So I am now forced to enter into the world of jargon. The technical term for the measurement of the hub I need is the over locknut distance! Just trips off the tongue and makes complete sense...not!

Basically the width of the wheel from one side of the hub to the other needs to be around 110mm to fit inside the frame. Now I know that I will need 26" diameters wheels with an over locknut distance of 110mm. I am resisting becoming a cycling jargon nazi and i know that most of these posts are very basic. I am hoping that anyone who enjoys cycling and has no clue whatsoever about how their bike works may read this blog and come away with a small amount of knowledge. I am having to learn as I go and to be honest what's the worst that could happen, its only a bike after all!


Wednesday 25 September 2013

Now what!!!

There are plenty of websites, blogs and forums that offer lots of advice for building  a single or fixed speed bike. It seems that most of the forums are populated by people who were born as experts! Whenever someone new comes along to ask for some basic advise it is usually met by calls of 'buy a ready made one and come back when you have learnt something' or 'you have posted this onto the wrong thread this is the metallurgy for hipsters thread.....'. so I have decided to largely ignore such places and find my own way.  
I have a technical background, I have worked in various engineering  type jobs in the past and I know my way around a toolbox so it should be fairly straightforward.....shouldn't it?

Also I am a 42 year old father of two, slightly padded around the framework and a bit grey around the temples so when I go into a cycle shop and I am met by someone wearing a beaney hat in the height of summer who can't look me in the eye during conversation and says 'what you want mate is one of those....' (funny enough the most expensive option) before I've opened my mouth, I kind of get put off going into those shops. There are some very good cycle shops with very good people working in them. If you have one of those near you then use them. Its like a forum but with real people who can interact with other human beings!

So, rant over, where to start indeed.....Firstly terminology.

What is a bottom bracket and is my bottom big enough to require one?
What are dropouts? Are these the people with the beaney hats in the cycle shops?
Spoke nipples? Not going there!

Again I am largely ignoring most of the pseudo technical jargon and sticking with the obvious stuff. Apparently a bottom bracket is the spinney around bit the pedals are fixed to. Right now you know.
Dropouts are where the wheel axles go through. Easy really.
Spoke nipples I think is a medical complaint. I suspect a Google images search would throw up all sorts of possibilities!
To start the build I have been pondering on what bit to do first.
I have reached a decision that the rear wheel would be as good a place as any. This will give me a position for the rear sprocket (the bit at the back where the chain goes over) which in turn will give me a position for the bottom bracket (see above) which will have the crank (the bigger gear with the pedals on) fixed to it. So in theory if these are in line, The chain will run straight.
There is a whole heap of opinion around what size wheels are best and how many teeth the rear sprocket has (keep up) in relation to the crank (I'll be asking questions at the end). Again I'm not going to lose sleep about this yet. As I have a road bike at the moment I will try those wheels on the frame to see if they fit, if so I'll get them then. Easy really. Well in my simple mind it is.......


Never built a bike. Never blogged. What could possibly go wrong!

This is a first for me on many levels. Never built a bike before and I've never blogged before. Not sure if it will be interesting enough but thats never stopped me boring people before!
So the idea is that I build a single speed bike from scratch. I have bought an old Triumph Torrington frame from eBay which will, over time be transformed into, hopefully, a nice looking single speed bike which I can use for poodling about on instead of using my Specialized tri-cross which is good for blasting around on but not for leisurely family-friendly rides.  This is the frame. As the build goes on I will post the gory details such as essential measurements, components used, new swear words etc. For now the frame is sat under my desk at work waiting to be taken home and placed gently in the damp shed at the end of the garden. More to follow soon.....